Console Command to Use Aetherium Forge Again
| Dwarven Ruin: | |
|---|---|
| Added by | Dawnguard |
| Dungeon | Aye |
| Respawn Time | Never (storage is safe) |
| Level | 15 |
| Occupants | |
| Dwarven Automatons | |
| Console Location Lawmaking(s) | |
| DLC1Bthalft01 | |
| Ore Veins | |
| # of Silver | two |
The Aetherium Forge is an aboriginal Dwemer forge, guarded by several Dwarven automatons. Access is gained during the quest Lost to the Ages via the Ruins of Bthalft.
Later defeating some bottom Dwarven automatons, you lot will see The Forgemaster, a unique Dwarven centurion that has a Flame Cloak-like power and shoots flames or a fireball instead of steam. Afterwards defeating information technology, y'all tin obtain extra materials in a nearby chest to utilize at the Aetherium Forge. In that location are three different items that you could create, only yous tin can simply employ the forge once.
Smithing [edit]
| Name (ID) | | | | Raw Materials | Delta | Ratio | |||||
|---|---|---|---|---|---|---|---|---|---|---|---|
| | | | Other | | | | | ||||
| Aetherial Crown ( 20 00575a ) | ii | 2250 | 0 | 1 | 2 | 2 | | -2.2 | -10 | 0.48 | i.00 |
| Aetherial Shield ( 20 005759 ) | 12 | 2000 | 26 | ane | 4 | | half dozen | 680 | two.00 | 1.52 | |
| Aetherial Staff ( xx 00575e ) | 8 | 1445 | North/A | ane | 2 | 1 | | 3 | -xv | 1.sixty | 0.99 |
[edit]
- Lost to the Ages: Search for the Dwemer'southward Aetherium Forge.
The Aetherium Forge [edit]
You enter via a lift down; at the bottom, before activating a lever to the right of the gate to open up it, turn to your correct and jump over a depression wall. Follow the wall around to the right to discover a Dwemer breast with an apprentice-level lock. Past the gate, in front of y'all is a stone pool of water with a piece of Dwemer fleck metal on the border of the pool. Equally you lot follow the path downward several flights of stairs, braziers will calorie-free your mode. After you descend the third set of stairs, you will face the kickoff of a rock bridge, while to the left, a path leads down to the h2o. Heading due south from the bottom of the ramp and staying against the wall at the bottom, underwater lies an unlootable skeleton with a Dwarven sword and an empty random soul gem nearby. Also, behind the waterfall to the west is an alcove above the h2o with an proficient-locked chest.
Crossing the first span of the bridge, you will come up to a stone wall with a big sculpture of a Dwemer face. Under the sculpture is a stone shelf holding a Dwemer cog, a Dwemer gear, a slice of Dwemer bit metal, a big decorative Dwemer strut, a Dwemer gyro, and two rubies. Backside the wall with the face sculpture, drop down to a ledge to find another apprentice-locked breast. Cantankerous the 2nd span of the bridge and pass under a stone curvation. In front of you lot are two flights of stairs, separated by a big stone wall leading upwards. On the outside of the stairs are statues of Dwarven spheres. Turning left and following the cliff border, you will somewhen come to a juniper tree; only to the right is an enchanted Dwarven battleaxe. Going back to the stairs and climbing the first flight leads to a higher level; between the two sets of stairs are four rock benches facing a statue very similar to the i that yous had to identify the shards into to gain access. To the right of the first flights of stairs is a raised area that can be accessed by climbing iii or four steps upwards the second flights of stairs and jumping upward. Among the rocks you will find an inert Dwarven spider worker underneath another juniper tree.
Climbing the second flying of stairs will bring you to a courtyard area with a dead tree in the centre. On the left against the south wall is a stone table and demote; on the tabular array is a Dwemer cog, a piece of solid Dwemer metal, a large Dwemer strut, a slice of Dwemer scrap metal, a piece of bent Dwemer chip metal, and a Dwemer gear. Further along this wall, in a pile of rubble, you will find another adept-locked breast. Against the north wall contrary the first tabular array and bench is a matching i; this one holds a Dwarven bow and a set up of eleven arrows. To the left of this tabular array is a stone curvation that leads north to a stream being fed by a waterfall. There is a glowing mushroom growing under the arch, and beyond it, there are i each of Namira'due south rot and wing amanita, with a second fly amanita growing next to the water'southward edge at the kickoff of a ramp leading down into the water. Nonetheless, it might not exist possible to interact with this growth. Following the shore east, you will detect a white cap and another fly amanita growing, every bit well equally two argent ore veins. Simply by the second vein is a stone arch with two more glowing mushrooms growing on it. In the water at the very bottom, before it drops over a waterfall, is a random, filled soul gem. There is an unlootable skeleton under the water against the west wall, with a random weapon and a medium coin purse next to it. There is also an adept-locked chest on the north shore of the stream. Going southwest from the arch will atomic number 82 you to the 2nd juniper tree seen before, providing a quick return to the courtyard.
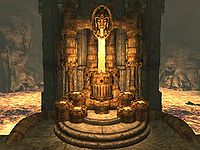
The way forrard is through a gate in the western wall. It has two kinetic resonators above it, one on either side; shooting both of these with a missile, either physical or magic, will open the gate. Passing through the gate will bring you to the pinnacle of a flight of stairs, with a stone bench on your correct. At the bottom of the stairs is a set of doors to the south, with a scuttle on your left. In front of the scuttle is a potion of ultimate healing, a random potion of healing, a random potion of magicka, a Dwarven helmet, and an elixir of resist fire. Through the doors, you get your start look at the forge.
In order to clear the dissentious steam from the room, you volition need to plough it off using valves on raised platforms on either side of y'all. There are shallow alcoves higher up the ii valves, from which a series of Dwarven spiders and spheres will assault you. The Aetherium forge is directly in front of you. On the bottom level against the east wall is a stone table with an unlocked chest built in; on the tabular array are ii random potions (ane of which is a healing potion), a pair of Dwarven gauntlets, and an enchanted Dwarven greatsword. Confronting the w wall is a similar stone table with another unlocked chest. On this tabular array are three Dwarven metal ingots, a large decorative Dwemer strut, a piece of Dwemer scrap metallic, a Dwemer gyro, and a centurion dynamo core. The chest contains all the items yous will need to craft whatsoever one of the possible Aetherial items listed in the Smithing department of this page.
On either side of the forge are ramps leading downward to the lava. With loftier enough health, burn down resistance, or the Go Ethereal or Whirlwind Sprint shout, you can reach three additional areas featuring loot beyond the lava. To access the first 2 areas, plough outwards from the ramps and follow the walls along to the stop, where y'all will reach 2 unlocked gates that open outwards and allow admission to the 2 areas, each of which contains an unlocked chest and several pieces of Dwemer metalwork scattered on the ground. Y'all can then follow the paths upward to gates that permit you lot to drop back onto the bottom level nearly the two stone tables. The 3rd accessible lava area hides an unlocked chest up a ramp behind the large rock colonnade you can see in the southeast corner of the room; stay to the right-hand side of the pillar to go upwardly the ramp.
One time you have spoken with Katria after using the forge, the quest ends, and the stairs that dropped and trapped you in this room volition rise dorsum into place, allowing you to leave.
Notes [edit]
- Multiple soul gems tin be plant underwater near the archway and about the sealed gate.
- The spheres and spider will repeatedly turn the valves dorsum on.
rutherfordlableason.blogspot.com
Source: https://en.uesp.net/wiki/Skyrim:The_Aetherium_Forge
0 Response to "Console Command to Use Aetherium Forge Again"
Post a Comment